

How Do You Put Together Glass Dish Garden Flowers
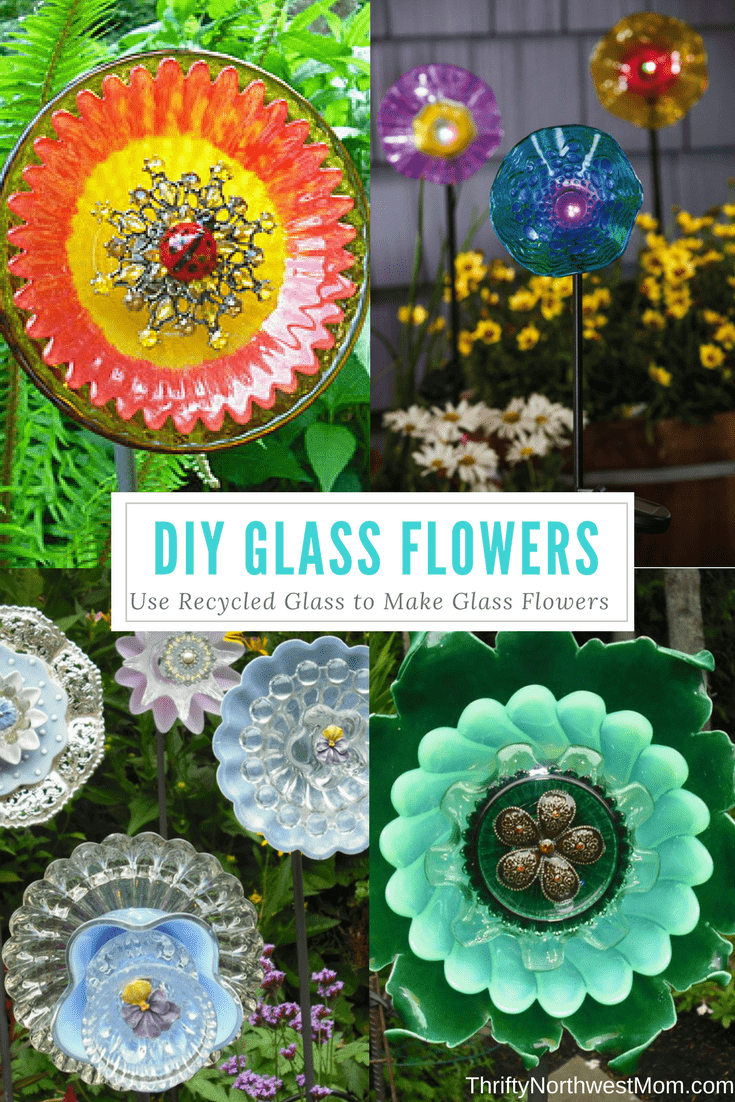
How to Make DIY Glass Flowers
If you do not have the patience to grow real flowers, or if you do love to garden and add art pieces as accents to your garden, you are going to love these glass flowers, made from recycled materials. They are the perfect upcycle project for the summer time, and make beautiful gifts for others too. This is the perfect time of the year to start collecting pieces to make these glass flowers too, since garage and estate sales are prevalent this time of the year. Spend a weekend shopping for used dishes, bowls, and more that you love. Look for shapes and colors that will blend well, and nest inside each other.
If you are interested in making the glass garden flowers for your garden, here are some tips to use while shopping for the glass (and then see below on how to make the glass flowers with plates and more)!
Tips for shopping for dishes to make Glass Garden Flowers:
*Start by searching your own cupboards to see what dishes you might already have on hand. It could be a great way to display that special dish you have been holding onto from your great grandma for instance.
*Other great sources for dishes are thrift shops (shop their sale days), garage sells and neighbors and family members (let them know to drop their unwanted dishes off with you.
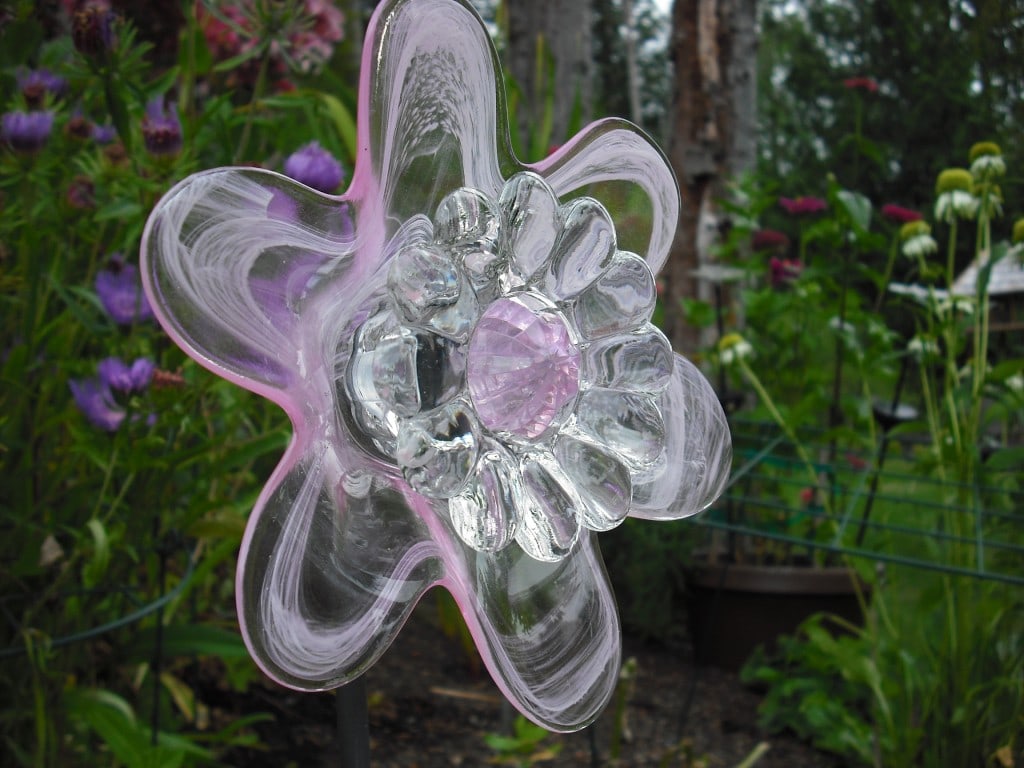
*Think beyond just your standard dishes. For example large bowls or chargers make great larger flowers. Old glass ash trays make nice centerpieces for the flower s, and bowls and small vases will make a nice funnel looking flower.
*If you have storage space, stack all of your plates you are collecting on a shelf. It makes it so fun to mix and match and design flowers that way (and my kids love to get involved and get creative too)!
*Have fun with it!

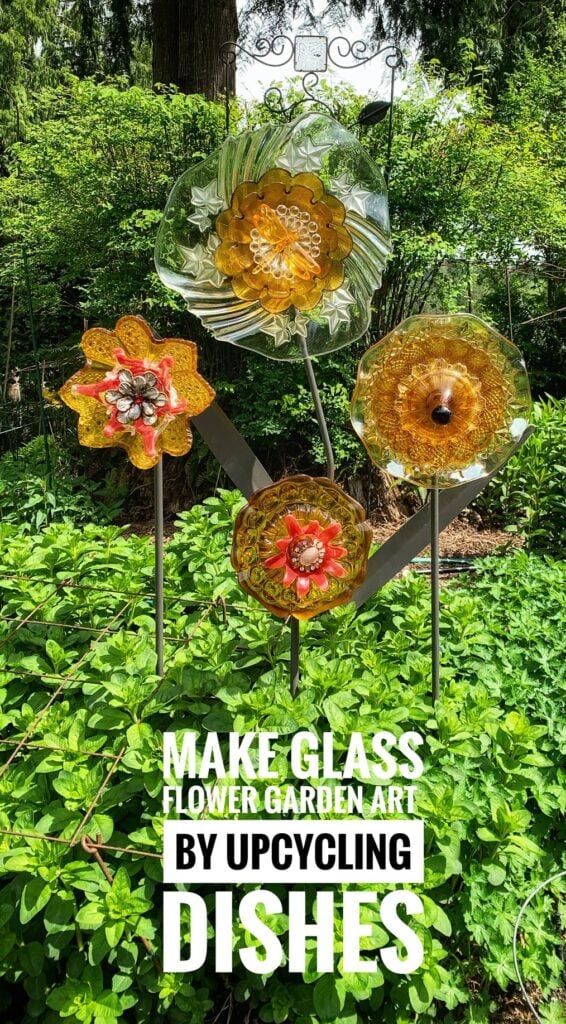
The photo below is my front yard in the summer with my glass flowers. Most of my flowers are growing but not blooming yet, so I use glass flowers made from recycled dishes, to brighten it up during all seasons. The photo at the top of the page is my moms garden, and she uses bouquets (three similar looking flowers grouped together), to create statements in her gardens.
I am very fortunate in that my mom makes these, so we have learned from the best. She drills her glass flowers with a diamond drill bit and creates stems out of custom made iron work they create on site. These flowers are pricey. They can cost upwards of $100. The good news though, is that she has shared some tips with us on how you can make your own version of this glasswork on a dime (a $5 version and a $10 version)!
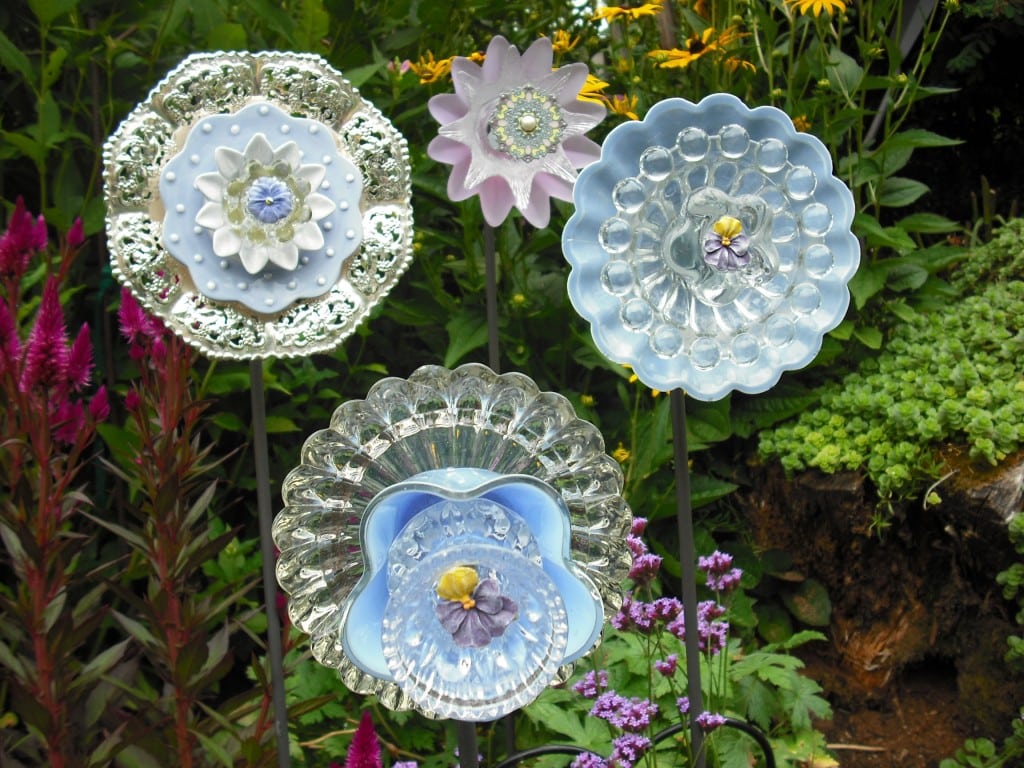
The flowers are all made from recycled glass. They are dishes, bowls, ash trays, chargers and plates that are mostly found at local garage sales and thrift stores. We simply look for pieces that we thing will make a beautiful floral look. Vases can be used if you want a more three dimensional look
I have had the pleasure of making a few of these glass art beauties with my mom.
Here is the basic process for making glass flowers:
- We start by playing around with all of the glass, nesting one piece into the next until we find a look we like.
- They use a diamond bit (and wear protective glasses) to carefully drill a hole in the center of each dish.
- The pieces are then held together with a basic nut and bolt system.
- They make their own iron stems, but we have some other DIY options below.
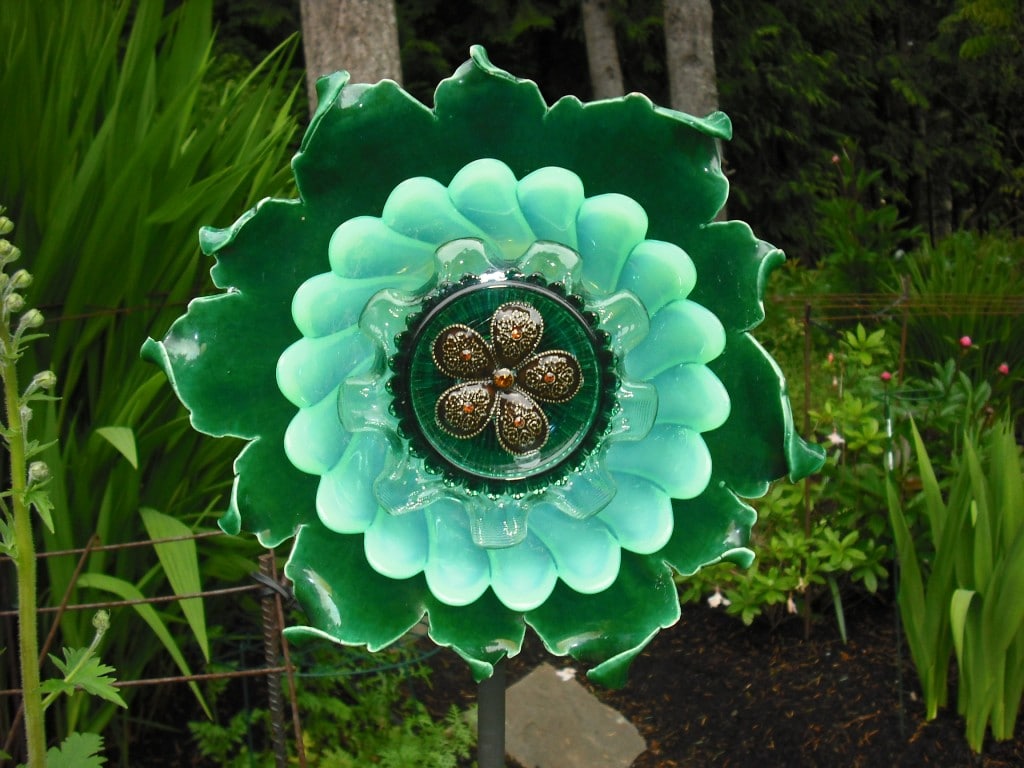
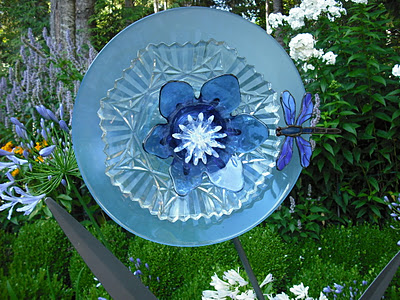
Here are some more examples of flowers she has made from reclaimed dishes!
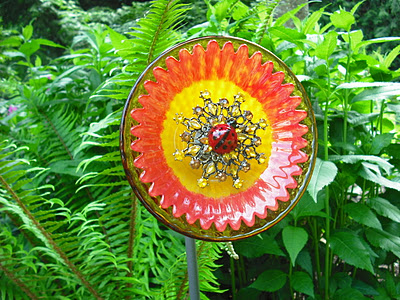
Glue butterfly's, lady bugs, dragon flies, or whatever other creatures you can find to the side of your plate for extra drama.
And one we made from a silver charger in my front yard (shown below). I have seen these go on sale for around $1 before – so its a fun option too. They get great reflection from the sun!
How to make your own DIY Glass Flower for Garden Art:
Here is how you can make a simple version at your house, that you can use indoors or outdoors.
Here is how you can make your own version of these beautiful glass flowers from items you may have at home, find at a garage or thrift sale, or barter with your friends for. Display them in your house, use them as gifts, or hang them on walls in your garden. However you choose to display them, they are likely to be a big hit with visitors.
To display in a garden, you can either add a picture hanging piece on the back and hang on a fence, or put a nice solid wooden stake in the ground and mount on that.
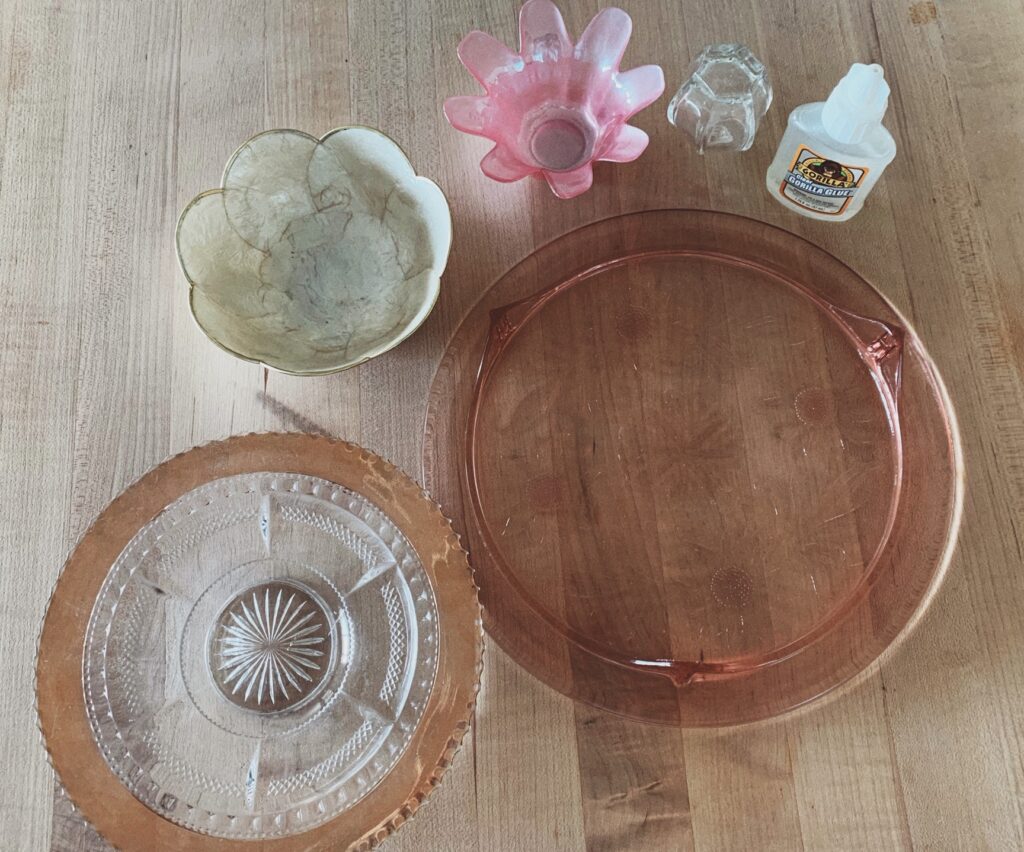
Supply List:
- Glass plates, and bowls
- Glue (epoxy glue, Gorilla glue or E6000 work best in our experience)
- Plate stand or plate hanger
Directions:
The most important part of this project is finding the glassware. We found ours at a local second-hand store, garage sales, the Dollar Store, or our own cupboards.
The first thing to keep in mind when shopping for glass is to think of the big picture. Each of these pieces on their own might be considered a bit tacky. You also want to think about dimensions. Things that fit inside each other, and give a more traditional flower look to them work well. You can use bowls if you want a more dimensional piece.
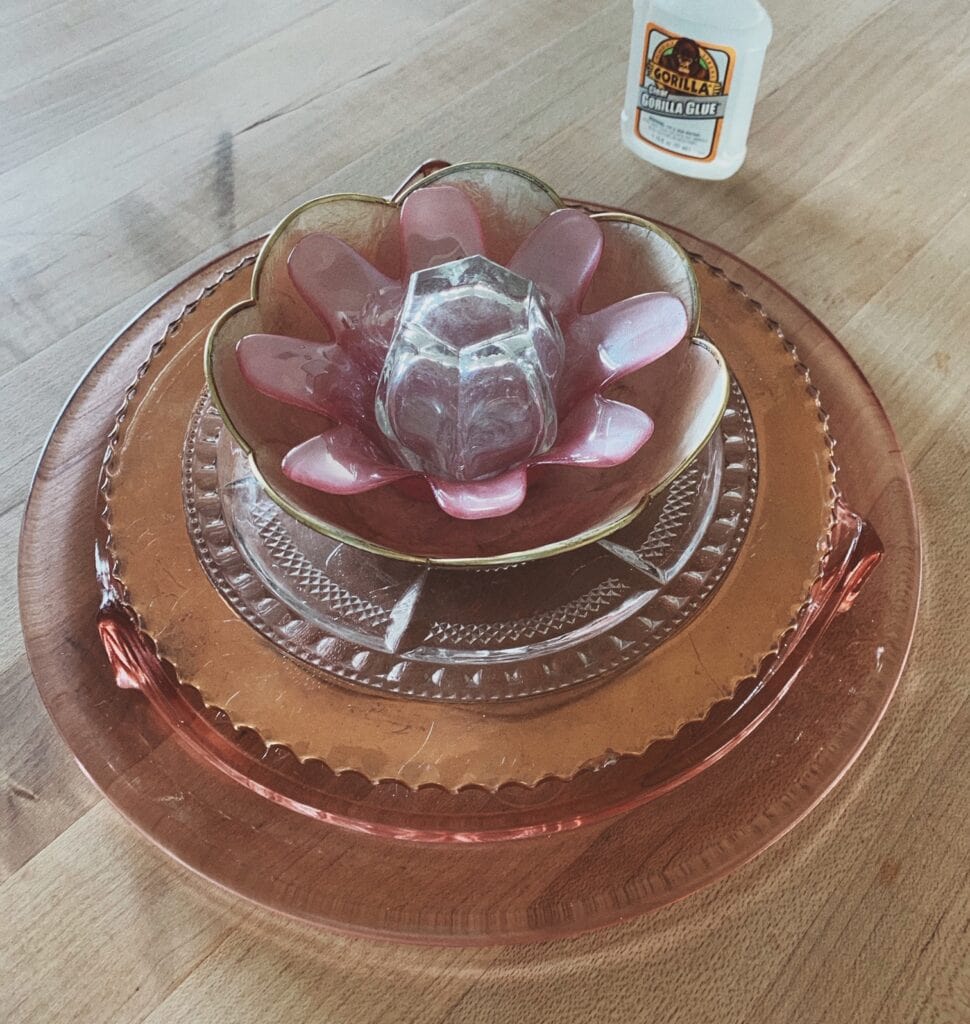
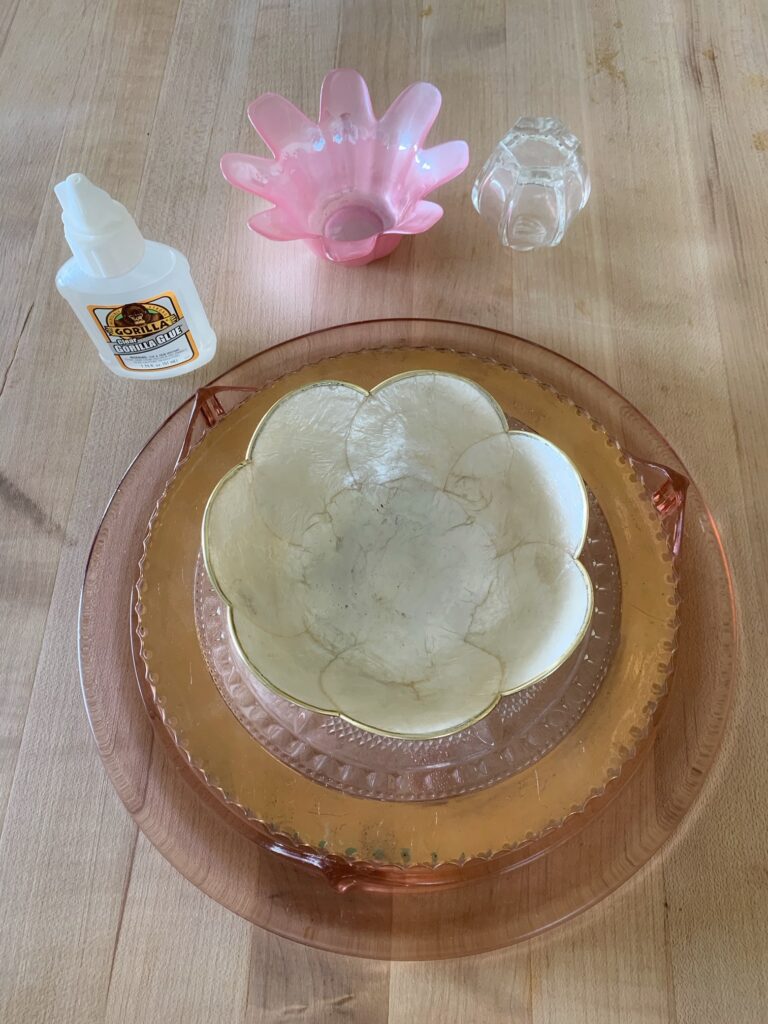
Get your plates all set out and design your flower before you start glueing. Once you know what you want your finished flower to look like start with the bottom piece and glue them on in layers, working up to the final center of your flower. We used the quick set epoxy glue. You will need to follow the instructions on the back of your glue, but essentially you mix a small amounts of a two part glue in a discardable dish and then you are ready to use it. It dries in about 5 minutes, so you will need to go to work right after mixing. You can also use Gorilla Glue for this, but it dries more yellow
We started by putting a bead of glue around the bottom of the second largest plate and gluing it to the center of the gold cat plate pictured above. If using the epoxy glue method, allow to dry 5 minutes before starting next layer for best results.
We repeated that step for the rest of the layers as well, allowing to dry between layers, then giving it a good 24 to 48 hours to really dry thoroughly once you have them all glued together.
Once you are finished with your flower you could use the same glue method to attach a plate hanger to the back of your flower, or get a plate stand to use to display it in (we found this one at the Dollar Store). Its that easy, but makes a gift people will be talking about for a very long time. They are great dining room display, you could use pastel colors for a nursery gift, or do something in green and red to use as a host/hostess gift for a Christmas party. I will be putting this one in my office, just for something pretty to look at.
Other Posts You Might Enjoy:
- DIY Garden Gate using an old bed frame
- Planting a flower in a boot – such a cute keepsake!
- Reuse and Repurpose Items to Create Beautiful Planters on a Budget
- Plant a flower bed in a wagon
Do you plan on trying your hand at the glass flowers? Be sure to share a photo with us on Facebook to see what you create!
How Do You Put Together Glass Dish Garden Flowers
Source: https://www.thriftynorthwestmom.com/using-recycled-glass-to-make-flowers/
Posted by: frazieroffily.blogspot.com
0 Response to "How Do You Put Together Glass Dish Garden Flowers"
Post a Comment